Genealogy is the study of family origins and history and it is not just tracing your family tree but understanding about your heritage and creating a story about your family. It is a simple way to keep track of important information and will prove to be a great learning experience. Therefore, it is vital to preserve these data to connect with the past. It begins with your family members who are alive and then moves backwards through time. There may be old documents, photographs, artifacts etc that belong to your family which reveal various facts about your current family and their stories. Digitization of these documents and photographs with the assistance of a document scanning service is the best way to preserve them for posterity.

Digitizing Old Family Records and Photos
Old photographs can be an invaluable research tool, containing hidden clues that may be previously unknown names of both people and places that can lead to further discoveries. Digitizing the photographs and old documents, uploading, storing and collaborating with relatives have helped many family researchers gain new insights into the stories and faces depicted in the worn images. So here are some expert tips to scan your old family records.
- Prioritize and digitize: Find out those things that are valuable and irreplaceable such as records or photos that you can’t get another copy of, or original photos or documents of your ancestors. So, start digitizing things and consider it a priority.
- Scan at 300 dpi: The quality of scanning is important. Scanning at 600dpi to TIFF is ideal for creating archives as it provides the flexibility to zoom. But scanning at 300 dpi is better as it will take only less disk space and the images will still look sharp. Higher-resolution scans take longer, and require pricier equipment and more storage space.
- Pick a file format: Most of the genealogists scan photos to JPG or TIFF and documents to PDF. A TIFF file helps to preserve better whereas JPG enables quick sharing and emailing. JPGs are smaller and easier to work with but deteriorate every time you save the file. If you want both quality and flexibility, then choose TIFF and for everyday use you can consider JPG.
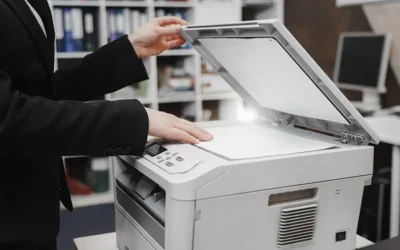
- Keep your tools ready: Having the right set of tools is important to obtain quality output. Using an all-in-one scanner is good for genealogy. You can also use your mobile phones and tablets to scan as it can be a good solution. Make sure to have a good app for scanning the records. For proper scanning you will need the following tools:
- Flatbed scanner
- A clean microfiber cloth
- The software that comes with your scanner
- Photo editing software and compressor are optional
Most scanners come with at least basic software for color and tilt correction, red-eye removal, cropping, digital dust removal, image brightening and/or photo-stitching for oversize images.
- Cleaning and prepping: Once you have your tools ready, you can start prepping. Make sure that the scanner glass is clean and free of dust or any other particles. In case of grease or any other stubborn stain, you can use glass cleaner on a soft cloth and wipe it out. Prepping the records and photographs is also essential. Remove paper clips, staples, tape etc., from the originals if possible. Don’t clean photos with erasers or water or any other solvent cleaners, it can damage the photograph.
- Break down the scanning project: If you have large amounts of records and photographs to be scanned then divide the documents into sections. Decide which photos you want scanned first and then separate the photos into piles or boxes that you’ll work through.
- Begin scanning: Handle all the documents with care. Don’t put photos or fragile or torn documents through a scanner’s automatic feeder without removing the staples or clips. This can damage the documents further and the more you scan, the more it gets damaged due to the exposure to light and mishandling. Do not flip the pages quickly, treat them with care and make sure that you don’t push down the scanner lid. Scan all documents with full color to get more clarity.
- Keep track of the owner: Most documents, photographs, art works and other materials published within the past 75 years are copyright-protected. Original, unpublished works are protected for 70 years after the author’s death and it requires the permission of the copyright holder to publish or reproduce the same. The same applies in the case of images too. If you have an image of a record, tombstone or other artefacts at a website, check with the administrators about permission to reprint. The item photographed might not have copyright protection, but the digital image of it may.
- File the document as you complete: Once digitization is over, it is important to focus on organization, metadata and backup. Your computer may have a storing facility in it or you can use photo management software like Adobe Photoshop Lightroom, Apple Aperture or Photo Director. Consider a file naming process that is understandable. Do not use just numbers or alphabets, use proper names based on date or issue or time period.
- Always keep a back-up: Scanning requires a lot of time and investment and scanned copies should be backed up. Storing digitized copies only in a hard disk or computer is not a good idea because these storage devices can get corrupt and lead to loss of all data. So, the best way is to store digitized data in one or two hard disks, and also store them outside in other locations away from your residence/office.
Other Important Scanning Tips at a Glance
- Make sure to dust off your photos before scanning. Use compressed air to blow any dust off your photos.
- Do not flatten the creases of your old photos or documents because flattening the crease by ironing can damage the photo or document.
- After scanning you can edit the photos, and crop and straighten them.
- You can also make other editing like adjusting the color, removing red eye, and digitally removing creases.
Digitization of family records provides deeper knowledge about your family and helps you gain better understanding about your ancestors’ involvement in a famous historical event. It also helps to determine genealogical proof of a family connection for potential heirs. Genealogy is a very important task for any family that has massive amounts of documents or records for digitization. With the help of a document conversion company all important records can be digitized, stored safely and managed efficiently.